

Being able to upload files and use them afterward is the required feature of many applications. Sometimes this is not a trivial task to accomplish.
So, this is going to be the topic for this blog post.
We are going to upload files to the server (.NET Core Web API part) and then use those files in our Angular client app. Also, in our next article, we are going to show how to download files using ASP.NET Core WebAPI and Angular and with it, we are going to complete this story.

In this post, we will stick to the images, but the logic is reusable for other file types as well.
VIDEO: Uploading Files with ASP.NET Core WEB API and Angular video.
We have created the starter project to work with through this blog post and it can be downloaded from Upload Files .NET Core Angular Starter Project. We strongly recommend downloading this project because it would be much easier for you to follow along. In this project, we’ll create a new user and display all the created users as an additional feature. We are going to modify the create-logic part by adding an upload functionality having a new user created together with an image path related to them.
Let’s start.
Controller and Action Logic – .NET Core Part
After we’ve downloaded our starter project, we can start by opening the UploadFilesServer project.
This project is created on top of the SQL database, so to create that database, we need to run the update-database command in a Package Manager Console window. By doing this, we will execute our migrations and create the database with the required table.
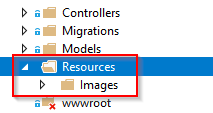
The next step is to create a newResources folder and inside it a new folder Images:
To continue, let’s create a simple API Controller file in the Controllers folder and name it UploadController.
Let’s modify that file by adding a new action that will be responsible for the upload logic:
[HttpPost, DisableRequestSizeLimit]
public IActionResult Upload()
{
    try
    {
        var file = Request.Form.Files[0];
        var folderName = Path.Combine("Resources", "Images");
        var pathToSave = Path.Combine(Directory.GetCurrentDirectory(), folderName);
        if (file.Length > 0)
        {
            var fileName = ContentDispositionHeaderValue.Parse(file.ContentDisposition).FileName.Trim('"');
            var fullPath = Path.Combine(pathToSave, fileName);
            var dbPath = Path.Combine(folderName, fileName);
            using (var stream = new FileStream(fullPath, FileMode.Create))
            {
                file.CopyTo(stream);
            }
            return Ok(new { dbPath });
        }
        else
        {
            return BadRequest();
        }
    }
    catch (Exception ex)
    {
        return StatusCode(500, $"Internal server error: {ex}");
    }
}
We use a POST action for the upload-related logic and disable the request size limit as well.
The logic inside this action is pretty straightforward. We extract the file from the request and provide the path to store the file. Moreover, if the file has a length greater than zero, we just take its name and provide a full path on the server to store our file and a path to the database. This database path is going to be returned as a result of this action after we place our stream into the defined folder. We could also check if a file with the same name already exists, but didn’t want to make the code more complicated at this moment.
To avoid the MultiPartBodyLength error, we are going to modify our configuration in the Program.cs class:
builder.Services.Configure<FormOptions>(o =>
{
    o.ValueLengthLimit = int.MaxValue;
    o.MultipartBodyLengthLimit = int.MaxValue;
    o.MemoryBufferThreshold = int.MaxValue;
});
Improve Reading from a Form Body
In our previous example, we use the Request.Form to read a form body and for smaller applications, this is just fine. But here, we are using a synchronous way to read the content from the form body, which in larger applications with so many users can lead to thread pool starvation. To prevent that, we can use asynchronous reading with the Request.ReadFormAsync() expression.
All we have to do is modify the action signature and modify our code inside just a bit:
[HttpPost, DisableRequestSizeLimit]
public async Task<IActionResult> Upload()
{
    try
    {
        var formCollection = await Request.ReadFormAsync();
        var file = formCollection.Files.First();

        //everything else is the same
This way, we read the form body in an asynchronous way and prevent the thread pool starvation.
Serving Static Files
Usually, all the files in the wwwroot folder are servable for the client applications. We provide that by adding app.UseStaticFiles() in the Startup class in the Configure method. Of course, our uploaded images will be stored in the Resources folder, and due to that, we need to make it servable as well. To do that, let’s modify the Program.cs class:
app.UseHttpsRedirection();
app.UseCors("CorsPolicy");

app.UseStaticFiles();
app.UseStaticFiles(new StaticFileOptions()
{
    FileProvider = new PhysicalFileProvider(Path.Combine(Directory.GetCurrentDirectory(), @"Resources")),
    RequestPath = new PathString("/Resources")
});
And that’s all it takes. We have prepared our server-side app and it is time to jump right to the client-side code.
If you want to learn in great detail about .NET Core project development, you can visit the .NET Core Tutorial.
Upload Files – Angular Part
Let’s open the UploadFilesClient project and take a look at the app component files. For the sake of simplicity, we have implemented all of our logic inside the app component.
To learn in great detail about Angular project development, you can read the Angular Tutorial.
So, the first thing we are going to do is to create a new Upload component in which we will handle all the upload-related logic:
ng g component upload --skip-tests
This will create three files in the upload folder, and we are going to modify the upload.component.ts file first:
import { HttpClient, HttpEventType, HttpErrorResponse } from '@angular/common/http';
import { Component, EventEmitter, OnInit, Output } from '@angular/core';

@Component({
  selector: 'app-upload',
  templateUrl: './upload.component.html',
  styleUrls: ['./upload.component.css']
})
export class UploadComponent implements OnInit {
  progress: number;
  message: string;
  @Output() public onUploadFinished = new EventEmitter();

  constructor(private http: HttpClient) { }

  ngOnInit() {
  }

  uploadFile = (files) => {
    if (files.length === 0) {
      return;
    }

    let fileToUpload = <File>files[0];
    const formData = new FormData();
    formData.append('file', fileToUpload, fileToUpload.name);

    this.http.post('https://localhost:5001/api/upload', formData, {reportProgress: true, observe: 'events'})
      .subscribe({
        next: (event) => {
        if (event.type === HttpEventType.UploadProgress)
          this.progress = Math.round(100 * event.loaded / event.total);
        else if (event.type === HttpEventType.Response) {
          this.message = 'Upload success.';
          this.onUploadFinished.emit(event.body);
        }
      },
      error: (err: HttpErrorResponse) => console.log(err)
    });
  }
}
So, what’s going on here?
We create two public properties. The first one is to hold the message when the upload action is finished and the second one is to show the upload progress. In the uploadFile function, we create a formData object and append the file that we want to upload.
The next action is to send a post request and pay attention to it. Besides the URL and body properties, we have another JSON object which states that we want to track changes of our HTTP request progress. As long as the upload is in progress, we will update the progress variable and show that percentage on the screen, but as soon as the upload is finished, we are going to write a message on the screen and emit a new event.
This event contains the body of our response, which is simply the database path of our uploaded file. We need that path to display the uploaded image with other user details.
The files with the small size will be instantly uploaded so, we will see 100% progress as soon as we select our file. But for the larger files, the progress bar will update its values for sure.
Template File Modification
To display all of the mentioned functionalities on the screen, we need to modify the upload.component.html file now:
<div class="row" style="margin-bottom:15px;">
  <div class="col-md-3">
    <input type="file" #file placeholder="Choose file" (change)="uploadFile(file.files)" style="display:none;">
    <button type="button" class="btn btn-success" (click)="file.click()">Upload File</button>
  </div>
  <div class="col-md-4">
    <span class="upload" *ngIf="progress > 0">
      {{progress}}%
    </span>
    <span class="upload" *ngIf="message">
      {{message}}
    </span>
  </div>
</div>
This logic is pretty straightforward except for the part where we hide the actual upload control and use its reference (#file) to invoke its click event with the button, which looks much better. We could have styled the upload control as well, but this is the better way, at least from our point of view.
Finally, let’s modify the upload.component.css file:
.upload{
  font-weight:bold;
  color:#28a745;
  margin-left: 15px;
  line-height: 36px;
}
And add a selector from the upload component to the app.component.html file:
<app-upload></app-upload>
<div class="row">
  <div class="offset-md-5 col-md-2">
    <button type="button" class="btn btn-primary" (click)="onCreate()">Create </button>
  </div>
</div>
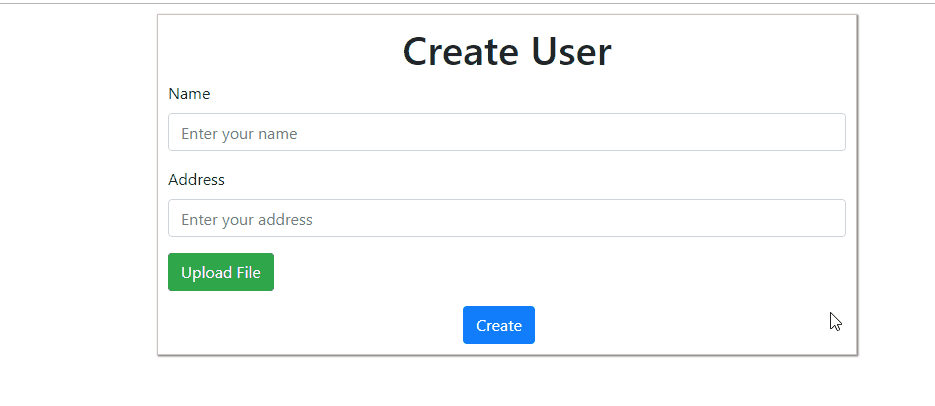
Excellent. We can now inspect our result:

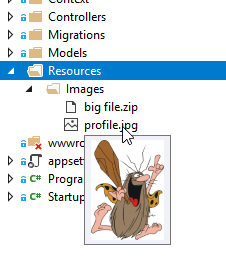
We can check our Resources/Images folder as well, to be sure that the files are really uploaded:
Using Uploaded Files in Our Application
As soon as we press the Create button on our form, we are going to see our newly created user. But its profile picture won’t be rendered. So, let’s fix that.
First, we need to react to the onUploadFinished event from the update component, and to do that let’s modify the app.component.html file:
<app-upload (onUploadFinished)="uploadFinished($event)"></app-upload>
This change forces us to modify the app.component.ts file as well.
First, let’s add an additional property to that file:
response: {dbPath: ''};
Then let’s add the uploadFinished function to populate this property:
uploadFinished = (event) => {
  this.response = event;
}
With this modification, we have the response object in which we can find a path to be saved in the database.
Lastly, we have to modify the user object in the onCreate function in the same file:
onCreate = () => {
  this.user = {
    name: this.name,
    address: this.address,
    imgPath: this.response.dbPath
  }
Now we know the image file path related to the created user, so let’s use that knowledge to render that picture next to other user details.
To do that, let’s change the table inside the app.component.html file:
<table class="table table-striped">
  <thead>
    <tr>
      <th scope="col">Image</th>
      <th scope="col">Name</th>
      <th scope="col">Address</th>
    </tr>
  </thead>
  <tbody>
    <tr *ngFor="let user of users">
      <td><img [src]="createImgPath(user.imgPath)" alt="profile picture" style="width:60px; height:60px;"></td>
      <td>{{user.name}}</td>
      <td>{{user.address}}</td>
    </tr>
  </tbody>
</table>
And let’s modify the app.component.ts file by adding the createImgPath function:
public createImgPath = (serverPath: string) => {
  return `https://localhost:5001/${serverPath}`;
}
Now, once we upload the file and create a user, we can see all the info in the table:
Uploading Multiple Files
If we want to upload multiple files in any of our projects, we need to modify both the server and client-side code.
So let’s start with the server-side:
public IActionResult Upload()
{
    try
    {
        var files = Request.Form.Files;
        var folderName = Path.Combine("StaticFiles", "Images");
        var pathToSave = Path.Combine(Directory.GetCurrentDirectory(), folderName);

        if (files.Any(f => f.Length == 0))
        {
            return BadRequest();
        }

        foreach (var file in files)
        {
            var fileName = ContentDispositionHeaderValue.Parse(file.ContentDisposition).FileName.Trim('"');
            var fullPath = Path.Combine(pathToSave, fileName);
            var dbPath = Path.Combine(folderName, fileName); //you can add this path to a list and then return all dbPaths to the client if require

            using (var stream = new FileStream(fullPath, FileMode.Create))
            {
                file.CopyTo(stream);
            }
        }

        return Ok("All the files are successfully uploaded.");
    }
    catch (Exception ex)
    {
        return StatusCode(500, "Internal server error");
    }
}
After this modification, let’s change the client-side. First, we need to modify the input type file control by adding the multiple attribute:
<input type="file" #file placeholder="Choose file"
(change)="uploadFile(file.files)" style="display:none;" multiple>
After that, we are going to modify the uploadFile function:
uploadFile = (files) => {
  if (files.length === 0) {
    return;
  }

  let filesToUpload : File[] = files;
  const formData = new FormData();

  Array.from(filesToUpload).map((file, index) => {
    return formData.append('file'+index, file, file.name);
  });

  this.http.post('https://localhost:5001/api/upload', formData, {reportProgress: true, observe: 'events'})
    .subscribe(
      {next: (event) => {
      if (event.type === HttpEventType.UploadProgress)
        this.progress = Math.round(100 * event.loaded / event.total);
      else if (event.type === HttpEventType.Response) {
        this.message = 'Upload success.';
        this.onUploadFinished.emit(event.body);
      }
    },
    error: (err: HttpErrorResponse) => console.log(err)
  });
}
One interesting thing to pay attention to is the use of the Array.from() function. Even though the filesvariable contains all the selected files, it is not an array. So, in order to use the mapfunction, we are using the Array.from()syntax, which will convert the array-like object into the new array copy. The rest of the logic is pretty straight forward.
And that is all that takes. Now you can test your code and check that your files are uploaded.
Conclusion
In this article, we have learned:
- How to code our server-side action to handle file uploading
- The way to create an upload component in our Angular application
- How to use uploaded files in the Angular application
In the next article, you can read how to Download Files with ASP.NET Core Web API and Angular.
Hi,
How can I control fileType before upload?
Hi. The best way is to check on the server. You can inspect the file name and verify the extension. It can be done on the client side, with the input control, but it is not recommended. In this article: https://code-maze.com/download-files-dot-net-core-angular/ we have some custom way to verify that the file is an image. Also, there are some other tools that can be used for this purpose, which is the more efficient solution for sure.
Hi, my “multiple” attribute not working, I can only select 1 file. Do you have any ideas about this?
I really don’t. Using the “multiple” attribute should be enough to allow you to use multiple files at once.
My program exiting every time i try to upload file
The program ‘Porgram’ has exited with code 4294967295 (0xffffffff).
It happens only when request sended to UploadController
The others works well
Well, I am not sure. I have recently used this code for image upload and everything worked well. So, my advice is to download our source code and compare it with yours. That’s the easiest way to find out what is the issue.
It was not easy to find, but I found the problem)
Yandex browser behavior crashes my API every time i try to upload file
Tried the code on MS Edge, everything works fine
can we upload mp4 files ? is there a way to do it ?
I am getting this error of ‘net::ERR_SSL_PROTOCOL_ERROR’.
I am trying to access image using <img [src]=“createImgPath(user.profilePicture)”>
where user.profilePicture stores ‘Resources\Images\WIN_20211021_15_03_07_Pro.jpg’.
Kindly Help.
Have you tried our source code? Does it behave the same? Basically, it should work since this article was updated two months ago.
public async Task<ActionResult<fileResponse>> PostuploadFiles(fileResponse response)
{
List<fileResponse> ee = new List<fileResponse>();
if (ee != null)
{
foreach (var fileResponse in ee)
{
var king = await _Context.Employee.Where(x => x.ProfileImage == response.ProfileImage).FirstOrDefaultAsync();
//var king = await _Context.Employee.Where(x => x.ProfileImage == item.ProfileImage).FirstOrDefaultAsync();
if (king != null)
{
king.ProfileImage = response.ProfileImage;
_Context.Employee.Add(king);
}
}
await _Context.SaveChangesAsync();
}
return response;
}
i m not able mto save data in database there is some error in repository file i am not able to get that pls assist me
In your code, you are iterating through the empty list. The ee list is an empty one, you just have initialized it but it contains no elements. It is not null but it is empty, thus your code inside will never execute.
Hello, Marinko! Thanks a lot for the content. Can we use in-memory-web-api for backend mock: https://github.com/angular/in-memory-web-api? I used it but came to this error: Cannot read properties of undefined (reading ‘dbpath’)
Could you please suggest some solution?
I never used it, I am really not sure how it works.
Sir, when I publish my .net core web api, those folders(Resources\Images) are not present. I tried uploading my images its not uploaded and given 500 error. Then I created these two folders manually on hosted location then also it is not working, kindly help me to solve this problem.
same problem also , kindly help me to
Compact and Robust.
Thank you sir.
You are very welcome.
Hi Marinko,
Many thanks for this tutorial, looking forward to the downloading version next.
I did have a couple problems to work through. First, VS auto added ‘Microsoft.Net.HttpHeaders’ instead of the (apparently deprecated) ‘System.Net.HttpHeaders’. This meant that `ContentDispositionHeaderValue.Parse` returned a StringSegment (instead of a string), which doesn’t have a .Trim(char) method. Second it took me a bit of digging to get it to work as I hadn’t decorated the UploadController with route annotation. I know that’s a basic Angular concept, but I didn’t notice any prerequisites on the tutorial intro 🙂
Also, when I tried loading the end-project from your github, compilation failed due to ‘Could not copy “.nugetpackagessystem.security.cryptography.protecteddata5.0.0runtimeswinlibnetstandard2.0System.Security.Cryptography.ProtectedData.dll” to “binDebugnetcoreapp3.1runtimeswinlibnetstandard2.0System.Security.Cryptography.ProtectedData.dll”. Exceeded retry count of 10.’ errors. Installing with nuget and copying that file to the output directory didn’t help. I did manage to work out the Trim(char) and route annotation issues from this project so all good.
Thanks again, great job.
mcalex
Hello mcalex.
I am glad you liked the article and I hope you will like the download part the same, you can find the link in the conclusion part of this article.
Regarding your issues.
1) Yes, you are not the only one that had that problem, obviousely I have to mention that in the article. The System.Net.Http is not depricated since in our project it is 4.2.2.0 version. I believe the 2.0.x versions are depricated of that package.
2) Well yes, that route annotation has to be there 🙂
3) I’ve just downloaded our source code and it builds without a single problem. Maybe you placed it to deep in the windows exploerer folder. Have you tried pulling it back to the desktop for example?
Image saved in db with null but saved in api why?
I can’t be sure why. Have you tried downloading our source code and comparing it to yours?
Awesome video, just what I needed for coding the content management part of my husband’s stamp collecting website. Now he can upload images of his favorite stamps. Thanks!
Thank you too Debra. I’m glad the video helped you with your task. It is always nice hearing something like that 🙂
Thank you very much for the videos and codes and your plain and simple explanations. You’ve made it looks so easy to codes and learning. KISS (keep it simple and stupid). Your code is working fine. I did even change the staticfiles to D:myUploadFiles and it is still working. However, this app only works when you run the server app with different port (5001). I did differently.
1. This is specific for IIS enviroment
2. Create a virtual directory in the defaut website and name it ‘api’. The directory is the published version of the uploadServer app.
3. Convert the virtual directory to application.
4. The default root web app is the angular uploadfileClient.
5. I have made changed 2 things in the UploadFile Client:
a. from localhost:5001/api ==> localhost/api
b. since the client call the server thru the api application in the root web, I did change the controller [Route(“api/[controller]”)] to [Route(“[controller]”)].
I did download a file to test it and it failed with ‘CORS’ issues. So somehow an application in a root web works differently from a website with port number (localhost:5001).
Is it a bug from microsoft or is there a way to make it to work?
Thank you much. I learn a lot from this example.
Hi Renton Play. Thanks for reading the article and for the kind words. Regarding your problem, I am not really sure what is going on there and why do you get the CORS error. To be honest, I am not really sure that I understood entirely your deployment process.
Me either. The different is one is deployed as an application inside the wwwroot vs as a site running with different port (such as 5001). The message is the message I have seen after I hit F12. I just discover one more thing with this app. When I upload a large file, it doesn’t work and it works very well with small size file. Let me retest this app one more time.
Thanks.
Al right, I do have something to share with you regarding the upload-file app.
1. It never works if it is installed as an application in the rootWWW.
2. Moved it to a separated site (localhost:5001) and it works HOWEVER it doesn’t work with large file (for small images, yes it is working).
When I upload large file please see the error on the attachement – it doesn’t make at all. It is still blaming on the CORS…

Hi Renton.
1. I really don’t know what to say there. When you deploy Angular + Web API app, it should continue working as in the development environment. Now, I am just guessing here, but have you changed all the URIs in the client app since after deployment you are targeting a different URIs?
2. I don’t know how big files you are trying to upload. I’ve just tested this solution with a file 300 mb large and it works without a problem. I must admit I didn’t test it with larger files so, maybe there are some problems with files that are much larger.
By adding headers to the anguluar http, it helps eliminate the CORS issue. However, sizing is still matter. Here is the error message infamous 413. There are a lot of discussions about this issue. I tried to what suggest but it did not work.
Failed to load resource: the server responded with a status of 413 (Request Entity Too Large)

Any one out there can share?
Again, I really don’t know what to tell you. Today I tried to test only API with Postman, and together Angular + API apps. For both test actions I have used the file around 550mb in size. It works without a single problem. In your previous comment (but you placed it in a different section) you said that you are using 450-500mb file. So, my test is covering that for sure. Have you tried downloading our source code and running it?
first my background ( < 6 mths experience in .net Core) I was thrown on a project commonly developped and needed to make functionality for upload. So the project configuration had been done by a more experienced developer. In the end I stayed stuck with an 404, with an eventual success when I changed this in web.config
https://forums.iis.net/t/1233907.aspx?ASP+NET+Core+Web+API+deployed+in+IIS+returning+only+HTTP+Code+404
Hi Marinko!
I Hope You Will Be Fine.
I Have a Little Problem is That
After Uploading File/Image the file is Uploaded to Server
But If User Cancel the Form(Means: Not Create User Just go Back)
Then file Stay in Server How to Fix This ???
How to Remove File from Server if User Not Submit the Form.
Thanks for This Amazing Content. 💕
Hello. For that, you would require some sort of custom logic on the Angular side. For example, you can have a variable or an array (depends on your needs) where you will store the file name you just uploaded to the server. And then, if you click the create user button, you will remove the value from that variable or emtpy the array. But, if you don’t click the create button, but instead navigate away from the form, you can use the ngDistroy lifecycle, since it will cick in at that moment, and send a request to the API with the name of the uploaded file and remove it on the API level (if the array is not empty or if variable is not null or empty string). Of course for that, you have to have an API’s action to support that logic. This is something on top of my mind, maybe there are some better solutions, but this should work.
Thanks Marinko.
Thanks for this simple and thorough walk through. The only question I have at this point when uploading more than one file, eg. attach one, then another, then another, my progress shows 0-100% on all 3 values because they are referencing the public progress variable.
I am not sure what is the problem here. The progress resets for each uploaded file, and also tracks the progress of all the files inside a single request. Maybe I just disn’t understand the question.
where is onCreate ???
alos… the last thing you’d want is to serve all files in wwroot dont you think…
At the top of the article you can find a highlighted section with the link to the source code. Just inspect it and you will find the onCreate function in the app.component.ts file. We didn’t show it in the article since it is not needed and not the current topic. But as I said, everything is implemented in the source code available on GitHub and linked in the article.
Regarding the second statement, I am not sure where did we stored files in the wwwroot folder. But we did use the folder inside the project for the simplicity sake. If you want, you can store the files on the cloud or on the specific location on the disk, but we don’t want to guess whether your machine has the D drive or not… This is the easiest way to make the project run on all the local machines. It is up to the readers to adapt it as per their needs.
Hi,
The provided solution is working great. But I have a client service in between ther WebAPI and the client application, how can I send it to the webApi in other server through clientService?
I am not sure what do you mean by the client service? If you refer to a regular Angular service file than I can’t figure it out what is the problem. Just extract this logic to that service file and call it from your component. But again, maybe I am missing something.
Marinko,
There is a layer between Angular application and WebAPI. Angular app is communicating with API through a service (which I call a client service). How can send the file to the api using a model property through service?.
//Service call to communicate with WebAPI GetUserPost(GetUsersPostRequest request)
public async Task
{
// request.file = IFormFile file — sending file like this in a request
//calling API method($”{ApiEndPointHelper.User.UploadUserPostAsync}?{request.GetQueryString()});
return await _httpClient.GetAsync
}
//WebAPI method — to receive file in a request
========================================
UploadUserPostAsync(IGetUsersPostRequest request)
{
var file = request.file;
// logic to save the file.
}
Hope you understand the scenario.
Thanks
I understand, but I didn’t face the situation like that one yet. Usually, all my angular reqests end up on the controller’s action. In there I have access to the Request or HttpContext.
Hi Marinko, superb work and article.
I got it to work perfectly when running on localhost but a soon as I run the web api in azure I get “blocked by cors policy” when trying to log in. I have studied the solution on git and can’t find any differences in my code compared to the one you have used.
As said the upload works great running on localhost, but running in azure I get the CORS error at login. Have you been facing similar issued or do you know what could be the issue here?
It seems to have something to do with this;
app.UseStaticFiles();
app.UseStaticFiles(new StaticFileOptions()
{
FileProvider = new PhysicalFileProvider(Path.Combine(Directory.GetCurrentDirectory(), @”StaticFiles”)),
RequestPath = new PathString(“/StaticFiles”)
});
Thanks a lot,
Keep up the good work producing excellent articles!
Hello Mike. I really don’t have much experience with Azure publishing, but if the CORS creates a trouble for you than you have to modify the CORS rules. For the origin, you can’t have localhost anymore but the origin the requests are comming from. The code you have marked just help our app to accept the StaticFiles folder as a resource container for the static files next to the wwwroot folder.
Thanks, I think I have to dig a bit deeper into my own code, because when implementing the code from this article I get cors errors everywhere and can’t even log in due to errors like this Response to preflight request doesn’t pass access control check: No ‘Access-Control-Allow-Origin’ header is present on the requested resource.
Thanks for your explanation!
Hi Marinko.
Great post! But I need advice.
In database I have users and each one can save one file. Can I save file (for ex. .pdf) in Controller c# – Upload() method to database?
Or is better to save on path to file in database and file in folder Resources?
It is better to save just a path to the database. No need to extract all the data from the database, when you have your pictures in the project folder or on some other cloud server.
Thank you so much!
This is great!! I would love to see how you would also download that same uploaded file to your local computer.
Thank you Nicole. We are working on that article as we speak 🙂
Hello, Sir
Thanks for sharing this such a good example,
If we want to upload user data like name address and also upload user image in single form with post api than what to do. and can you please give show us that code with little bit explanation
and thanks in advance
Hi,
How can i upload upto 500mb file in sap.net core 2.1?Can anyone please help me out of this
Hi Marinko, thank you for your wonderful article. It helped me a lot.
I have one question though, I use this code to upload excel file data to SQL table. How can I display response coming from Upload() function in C# in front end? I’ve few other data coming too in
return Ok(response)like responseID, responseMessage, fileName which I would like to display on html page. Thanks in advance.Hello Vedansh. Well you can display that information by accepting the object you return from the server and then just populating the properties inside the .ts file. Of course you should use those properties with interpolation to display them in the .html file. The same way we did with the message and progress properties.
Hi Marinko, thanks for your reply.
I get that part. But my issue is how to call object inside Ok method in angular – uploadFile function. Currently it has subscribe to event. How can I add response coming from Ok method in to that function? Sorry I am new to Angular. Many thanks in advance.
Hi Vedansh. The function is not subscribed to the event but to the HTTP request, so all you have to do is to extract your object from the response. Please take a look at our Angular series: https://code-maze.com/angular-series/ this will help you a lot working with angular and consuming Web API, which is exactly what you need here.
Ah thanks. Just realised that you the object is coming in
event.bodyalready and had to extact it. Many thanks for your help 🙂You are very welcome.
Here is the code that I added on to your code to fix the issue but it did not help. There are a lot of talk and discussions regarding this issue (stockoverflow website mainly). File size is 450mb to 500mb that failed on my computer.
Thanks.
const headers = new HttpHeaders({
‘Access-Control-Allow-Methods’: ‘GET, POST, OPTIONS’,
‘Access-Control-Allow-Origin’: ‘*’,
‘Access-Control-Allow-Headers’: ‘Origin,X-Requested-With,content-type,Accept, Authorization’,
‘Access-Control-Allow-Credentials’: ‘true’
});
this.http.post(‘http://localhost:5001/api/uploadFile/upload’, formData, { reportProgress: true, observe: ‘events’, headers: headers })
Hello friends I got that error doing the uploading.
Access to XMLHttpRequest at ‘https://localhost:44362/users/update’ from origin ‘http://localhost:4200’ has been blocked by CORS policy: No ‘Access-Control-Allow-Origin’ header is present on the requested resource.
I already have the cors.
services.AddCors(options =>
{
options.AddPolicy(“CorsPolicy”,
builder => builder.AllowAnyOrigin()
.AllowAnyMethod()
.AllowAnyHeader());
});
Hi Raycel. In situations like this, I always recomend downloading our source code and running it. If it works, and it should, than you should compare your code with ours. Maybe you missed something. I.am.saying maybe because I can’t tell what is the cause of your problem if you have cors configured.
Hi, Please send me file upload code of Client side and Server side. [email protected]
Has anyone had a cors policy blocked error when trying to upload a file greater than the default 28.6mb ? Files less than 28.6 work perfect.
Hello Nick. I’ve just used this exaple to upload a zip file 279MB large. It worked without a problem. Plese tell me, have you included in the configuration this code:
services.Configure
o.ValueLengthLimit = int.MaxValue;
o.MultipartBodyLengthLimit = int.MaxValue;
o.MemoryBufferThreshold = int.MaxValue;
});
Hi, yes I have this in my ConfigureServices:
// adding the MultiPartBodyLength Configuration(options =>
services.Configure
{
// the max length of individual form values
options.ValueLengthLimit = int.MaxValue;
// length of the each multipart body
options.MultipartBodyLengthLimit = int.MaxValue;
// this is used for buffering the form body into the memory
options.MemoryBufferThreshold = int.MaxValue;
});
I also have this in BuildWebHost, thinking that Kestrel is the problem:
.ConfigureKestrel((context, options) =>
{
options.Limits.MaxRequestBodySize = 52428800; // null for unlimited.
})
And my controller like this:
[DisableRequestSizeLimit]
and also tried:
[RequestSizeLimit(52428800)]
Still no luck!
I really don’t know. Didn’t have problem like that. I am not aware are you creating your own project or just using ours for learning, but if you are using our example, try to download our source code (both .net core and angular) and upload a bigger file. As I said, I’ve used 279MB file and this works just fine.
Its on my own project. I will try downloading your project and see if that works. If so it must be a setting somewhere on my back end. I am using Angular 9 and .net core 3.1. Not sure is this is CORS or Kestrel returning the error. Thanks anyway.
Hi Marinko, I found the problem after stripping back my whole project and comparing to your solution. You need to have the commandName option in launchSettings.json set to ‘Project’ so it is executed with the .NET CLI directly on the command line. If the commandName is set to ‘IISExpress’ the upload is limited to 28.6 mb.
Hello Nick. Thanks for the information. But if you look at our launchSettings.json file, you are going to see that we have only the Project as commandName, there is no IIS at all.
Sorry yes I know that .Your project works correctly. I just wanted to post what my problem was just in case any one else gets the same problem it could save them lost of time. Thanks.
How can i upload the file only after click on a button and not right after select it? i want to select the file first and after click on a button make the upload
Hello Luis. Just don’t allow the button to corelate with the file.click() but create a separate event for the button and separate function to handle that event. In this example, you have the the button click event connected to the template reference variable #file. Just remove that connection and create your own event. Best regards.
this function return one pic and saved in dp how can saved all image not first image
public spliturl = (serverss: string)=>{
if (serverss.includes(“,”))
{
for(let i = 0;serverss.length;i++ ){
console.log(i)
var serpatharr=serverss.split(‘,’);
serverss=serpatharr[0];
}
return serverss
}
}
public onCreate = () => {
this.books = {
name: this.name,
ImageName1 : this.spliturl(this.response.dbpathsasstring)
,
imageName2 : this.spliturl(this.response.dbpathsasstring)
}
Well as much as I could get it, you call serverss = serpatharr[0]. But it should be serverss = serpatharr[i]. And pay attention to your for loop, the middle part (ending condition) is not good.
how can get filename from multiple and save file name in db
Well you would have to provide more information about what is your task here or what you want to accomplish. Regarding the file names, you already have that in the Upload controller. In the fileName variable we store a name of every single file that we want to upload. So you can create a local List and store all the file names inside. Once you have them all you can save them to the database.
first Error in Multiple
ERROR TypeError: Cannot read property ‘dbPath’ of undefined and visual studio 2017 not return dbpath in multiple
how can fix it in Multiple
second how can save all name file in database in Multiple thankyou
update.component.html how can find the file
Hello Bishoy. It is upload.component.html file, the update part was mistake. It is fixed now. Thank you.
POST http://localhost:49070/api/controller/upload 405 (Method Not Allowed) how can fix it
Thanks a lot! it’s a very clear tutorial,and it is working perfectly!
Thank you very much. We hope you will enjoy our other articles as well. If you want to leave any feedback, you can do that here: http://34.65.74.140/review-form/ . Best regards.
Thanks for sharing.
I have a trouble, I have saved image success to server’s folder, but in client I can’t get image from server’s folder.
it has error 404 not found. How can I get and display image?
It is very hard for me to help you without your code or any furhter explanation. With this that you presented, all I can say is that one of your URIs are not corrected. So pay attention do you target a good endpoints from the client.
Hi Marinko, dbPaths as you proposed, and then the client side onCreate function we can assign imgPath: this.response.dbPaths.toString() (comma-delimited) and save it to DB. To complete this article in the simplest way, I load the first image where the image column has more than one file by modyfing the createImgPath function as follows:
Great job, very well explained.
For upload mutiple files, the server side returns List
// Upload multi files. Display the first image
public createImgPath = (serverPath: string) => {
if(serverPath.includes(“,”))
{
var serverPathArr = serverPath.split(‘,’);
serverPath = serverPathArr[0];
}
return `https://localhost:5001/${serverPath}`;
}
Regards,
Tam
Hello Tam. Thank you very much for your comment and for the code snippet. It will help our readers for sure. I am glad you liked the article and I hope you will find other interesting articles on our blog. One more time, thank you a lot. Best regards.
Hello guys.
I am getting error when i try to upload multiply files,can you please paste the WHOLE CODE(functions) from the web api,and angular where the changes need to be maked please?
i am getting this error
core.js:1673 ERROR HttpErrorResponse {headers: HttpHeaders, status: 200, statusText: “OK”, url: “https://localhost:5001/api/upload”, ok: false, …}
I donwloaded the code from the github, uncomment the parts which were for multiply uploading files,but i dont know why am i getting this error.(The web api is running when i get the error…)
Thanks in advance
Hello Andrej. I showed how the multiple upload could be executed and what needs to be changed on the server and client to allow that kind of behavior. Whith this changes multiple upload must work, that is for sure. But if you want this entire app to work, than with multiple files you have to change some additional things. First of all with a single file you we return a db path from the server API action. And than store that response in the response variable in the AppComponent class. But if you return multiple db paths from your API, then you have to change that response variable into an array or what ever fits your needs. Try to debug your code in a browser to make sure whre it crashes, but I am pretty sure that this is the place due to wrong mapping on the client side. And also, read these comments, people changed their code due to their needs and it worked for them. I would post entire code, but we don’t have it, and the change isn’t that big, I assure you.
How can I concatenate the date to the filename?
Hello Marco. If you want to add the current date to the complete file name, you can do something like this:
var fullPath = Path.Combine(pathToSave, fileName, DateTime.Now.ToString());
Thx for that, but in the case of multiple files upload it shows this error : “ERROR TypeError: Cannot read property ‘dbPath’ of undefined”
Hello Souha. Please look at the code for the multiple file upload (the server side) I am not returning db path at all. This was just example how you can implement multiple file upload, you can see that I return only string message and nothing more. But take a look at the comment where dbPath variable is created. It says that you can create a List dbPaths and populate it with all the dbPaths, and then you can return that list as a part of an anonymous object, as we did with the single dbPath. So you just have to slightly modify solution in order to work. Right now, when you are finished with the server side, the client side expects an object with the dbPath property inside, so just change that to dbPaths and then work towards your solution.
All the best.
thx for replying it very fast
yes this was the problem it returns a string
so I have to change the code of the server side
Thank you for that, can you tell me, how to get dbpath when you click Create button and trigger uploadFile() that time,
In the same way. You will just send two requests towards server, first one will update the file and return dbpath and the second request will send complete object to the server for the database insertion.
can you help me.
I suggest that you use this project and its structure to upload file and to create object on the server. There is no point in having only one button, because you need to fill all the fields on the form and to send file for upload. Otherwise you would have to change complete structure of this project, and that is something I can’t describe in a comment section.
How to upload multiple files?
Hello. For that you should change your client and server logic a bit. On the client you will have to change the input type file control by adding the “multiple” attribute inside it. That will allow you to select multiple files. Then you don’t take just a first one “files[0]”, but all of them and iterate through each file to append them to the formData variable. On the server side you would take all the files from the Request.Form, not just the first one, and in iteration do the rest of the logic.
Hello, thank you for the quick reply. I’m new to Angular should the code look like this?
Because i get an error when uploading files
Client side:
files as File;
for (let i = 0; i {
if (event.type === HttpEventType.UploadProgress) {
this.progress = Math.round(100 * event.loaded / event.total);
} else if (event.type === HttpEventType.Response) {
this.message = ‘Upload success.’;
this.onUploadFinished.emit(event.body);
}
});
}
server side:
try
{
var file = Request.Form.Files;
var folderName = Path.Combine(“Resource”, “Images”);
var pathToSave = Path.Combine(Directory.GetCurrentDirectory(), folderName);
foreach (var item in file)
{
if (item.Length > 0)
{
var fileName = ContentDispositionHeaderValue.Parse(item.ContentDisposition).FileName.Trim(‘”‘);
var newFilename = Guid.NewGuid().ToString() + fileName;
var fullPath = Path.Combine(pathToSave, newFilename);
var dbPath = Path.Combine(folderName, newFilename);
using (var stream = new FileStream(fullPath, FileMode.Create))
{
item.CopyTo(stream);
}
return Ok(new { dbPath });
} else
{
return BadRequest();
}
}
return BadRequest();
}
catch (Exception ex)
{
return StatusCode(500, “Internal server error”);
}
}
Hello, you can check the article now. I have updated it with the multiple upload section. Hope this would help you. All the best.
Thank you very much. This helps alot. I had another approach with the following code
client side:
public uploadFile = (files: File[]) => {
if (files.length === 0) {
return;
}
const formData = new FormData();
for (let i = 0; i {
if (event.type === HttpEventType.UploadProgress) {
this.progress = Math.round(100 * event.loaded / event.total);
} else if (event.type === HttpEventType.Response) {
this.message = ‘Upload success.’;
this.onUploadFinished.emit(event.body);
}
});
server side:
public IActionResult Upload()
{
try
{
var file = Request.Form.Files;
var folderName = Path.Combine(“Resource”, “Images”);
var pathToSave = Path.Combine(Directory.GetCurrentDirectory(), folderName);
var dbpaths = new List();
foreach (var item in file)
{
if (item.Length > 0)
{
var fileName = ContentDispositionHeaderValue.Parse(item.ContentDisposition).FileName.Trim(‘”‘);
var newFilename = Guid.NewGuid().ToString() + fileName;
var fullPath = Path.Combine(pathToSave, newFilename);
var dbPath = Path.Combine(folderName, newFilename);
dbpaths.Add(dbPath);
using (var stream = new FileStream(fullPath, FileMode.Create))
{
item.CopyTo(stream);
}
}
else
{
return BadRequest();
}
}
dbpathsasstring = string.Join(“,,,”, dbpaths);
return Ok(new { dbpathsasstring });
}
catch (Exception ex)
{
return StatusCode(500, “Internal server error”);
}
}
}