

In the MVC pattern, Views handle the application’s data presentation and user interaction. They also help to establish a Separation of Concerns (SoC) within an MVC application by separating the user interface markup from other parts of the application.
A view is an HTML template with the embedded Razor markup. It has the .cshtml extension and is based on C#. Razor markup interacts with HTML markup to produce a web page that is then sent to the client.
Usually, there are separate view files corresponding to each controller action method, and view files are grouped into folders named for each of the controllers. Views are stored in the Views folder at the root of the application.

Let’s take a look at the BookStore app that we created in the previous article:
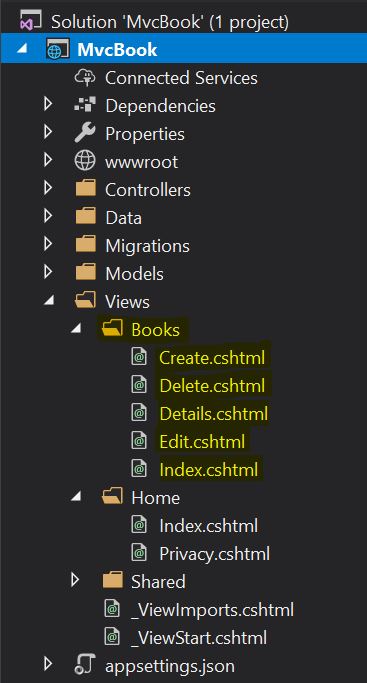
The views for the BooksController are stationed inside the Books folder within the Views folder. The Books folder contains the views for the Create, Delete, Details, Edit, and Index methods. When a user requests one of these actions, action methods in the BooksController use the appropriate view to build a web page and return it to the user.
In this article, we’ll reuse the model and controller that we created in the previous part with some minor changes. But we’ll create the views from scratch.
We strongly recommend visiting the complete navigation of this series: ASP.NET Core MVC Series.
To download this article’s source code visit: Views, Partial Views and Layouts Source Code.
Defining Model & Controller
Let’s reuse our existing model:
public class Book
{
    public int Id { get; set; }

    [Display(Name = "Book Title")]
    [Required]
    public string Title { get; set; }

    public string Genre { get; set; }

    [DataType(DataType.Currency)]
    [Range(1, 100)]
    public decimal Price { get; set; }

    [Display(Name = "Publish Date")]
    [DataType(DataType.Date)]
    public DateTime PublishDate { get; set; }
}
To keep things simple, we are going to implement an index, details and edit views from scratch. This will cover all common scenarios that we encounter while creating views.
Now let’s slightly modify our existing controller by removing the action methods that we do not use:
public class BooksController : Controller
{
    private readonly BookStoreWithDataContext _context;

    public BooksController(BookStoreWithDataContext context)
    {
        _context = context;
    }

    // GET: Books
    public async Task<IActionResult> Index()
    {
        return View(await _context.Book.ToListAsync());
    }

    // GET: Books/Details/5
    public async Task<IActionResult> Details(int? id)
    {
        if (id == null)
        {
            return NotFound();
        }

        var book = await _context.Book
            .FirstOrDefaultAsync(m => m.Id == id);
        if (book == null)
        {
            return NotFound();
        }

        return View(book);
    }

    // GET: Books/Edit/5
    public async Task<IActionResult> Edit(int? id)
    {
        if (id == null)
        {
            return NotFound();
        }

        var book = await _context.Book.FindAsync(id);
        if (book == null)
        {
            return NotFound();
        }
        return View(book);
    }

    // POST: Books/Edit/5
    // To protect from overposting attacks, please enable the specific properties you want to bind to, for
    // more details see http://go.microsoft.com/fwlink/?LinkId=317598.
    [HttpPost]
    [ValidateAntiForgeryToken]
    public async Task<IActionResult> Edit(int id, [Bind("Id,Title,Genre,Price,PublishDate")] Book book)
    {
        if (id != book.Id)
        {
            return NotFound();
        }

        if (ModelState.IsValid)
        {
            try
            {
                _context.Update(book);
                await _context.SaveChangesAsync();
            }
            catch (DbUpdateConcurrencyException)
            {
                if (!BookExists(book.Id))
                {
                    return NotFound();
                }
                else
                {
                    throw;
                }
            }
            return RedirectToAction(nameof(Index));
        }
        return View(book);
    }

    private bool BookExists(int id)
    {
        return _context.Book.Any(e => e.Id == id);
    }
}
We have the model and controller ready now. The next step is to create the views.
Using Razor Markup to Create Views
Views that are specific to a controller will be placed in the Views/[ControllerName] folder. Views that are shared among controllers are placed in the Views/Shared folder.
To create a view, let’s add a new file and give it the same name as its associated controller action with the .cshtml file extension.
For example, to create a view that corresponds to the Index action in the BooksController, we need to create an Index.cshtml file in the Views/Books folder. By doing so we’ll have a view for the index page.
In the first part of this series, we used HTML Helper methods to create our views. In this article, we are going to use a different approach for creating views using tag helpers.
Tag helpers provide an HTML-friendly development experience. For the most part, Razor markup using Tag Helpers looks like standard HTML.Tag Helpers reduce the explicit transitions between HTML and C# in Razor views.
In many cases, Tag Helpers provide an alternative approach to a specific HTML Helper, but it’s important to understand that Tag Helpers can’t replace HTML Helpers because some HTML Helpers don’t have a Tag Helper equivalent. So in some cases, we’ll still have to use HTML helpers.
Index View
Now let’s create the view for the Index page:
@model IEnumerable<WorkingWithViews.Models.Book>

@{
    ViewData["Title"] = "Index";
    Book firstBook = Model.ToList().FirstOrDefault();
}

<h1>Index</h1>

<p>
    <a asp-action="Create">Create New</a>
</p>
<table class="table">
    <thead>
        <tr>
            <th>
                <label asp-for="@firstBook.Id"></label>
            </th>
            <th>
                <label asp-for="@firstBook.Title"></label>
            </th>
            <th>
                <label asp-for="@firstBook.Genre"></label>
            </th>
            <th>
                <label asp-for="@firstBook.Price"></label>
            </th>
            <th>
                <label asp-for="@firstBook.PublishDate"></label>
            </th>
            <th></th>
        </tr>
    </thead>
    <tbody>
        @foreach (var item in Model)
        {
            <tr>
                <td>
                    <label>@item.Id</label>
                </td>
                <td>
                    <label>@item.Title</label>
                </td>
                <td>
                    <label>@item.Genre</label>
                </td>
                <td>
                    <label>@item.Price</label>
                </td>
                <td>
                    <label>@item.PublishDate</label>
                </td>
                <td>
                    <a asp-action="Edit" asp-route-id="@item.Id">Edit</a>
                    <a asp-action="Details" asp-route-id="@item.Id">Details</a>
                    <a asp-action="Delete" asp-route-id="@item.Id">Delete</a>
                </td>
            </tr>
        }
    </tbody>
</table>
We are using a strongly typed model here and the model is of IEnumerable<Book> type.
First, we declare a variable and assign the first book in the list to it. We do this to get the property names and assign them to the headers:
Book firstBook = Model.ToList().FirstOrDefault();
The asp-for attribute extracts the name of the specified model property into the rendered HTML. So let’s see how to render a label with the name of the Title property:
<label asp-for="@firstBook.Title"></label>
Great!
Now we need to render all the items in the books collection. For that purpose, we use a foreach loop which helps us render an HTML table. We can render a label with property values:
<label>@item.Title</label>
For creating action links, we can use the asp-action attribute and for passing parameters, we can use asp-route-{parametername} format. So in this case, for id parameter we use asp-route-id:
<a asp-action="Edit" asp-route-id="@item.Id">Edit</a>
Details View
Now, let’s create the details view:
@model WorkingWithViews.Models.Book

@{
    ViewData["Title"] = "Details";
}

<h1>Details</h1>

<div>
    <h4>Book</h4>
    <hr />
    <dl class="row">
        <dt class="col-sm-2">
            <label asp-for="Title"></label>
        </dt>
        <dd class="col-sm-10">
            @Model.Title
        </dd>
        <dt class="col-sm-2">
            <label asp-for="Genre"></label>
        </dt>
        <dd class="col-sm-10">
            @Model.Genre
        </dd>
        <dt class="col-sm-2">
            <label asp-for="Price"></label>
        </dt>
        <dd class="col-sm-10">
            @Model.Price.ToString("C")
        </dd>
        <dt class="col-sm-2">
            <label asp-for="PublishDate"></label>
        </dt>
        <dd class="col-sm-10">
            @Model.PublishDate.ToShortDateString()
        </dd>
    </dl>
</div>
<div>
    <a asp-action="Edit" asp-route-id="@Model.Id">Edit</a>|
    <a asp-action="Index">Back to List</a>
</div>
We’ve created this similar to the index view. But the model is of Book type. For retrieving the property name, we can use the asp-for attribute:
<label asp-for="Title"></label>
For displaying the property values, we can access the model properties using @Model directive:
<dd class="col-sm-10">
    @Model.Title
</dd>
Edit View
As soon as we are finished with the Details view, we can continue with the Edit view creation:
@model WorkingWithViews.Models.Book

@{
    ViewData["Title"] = "Edit";
}

<h1>Edit</h1>

<h4>Book</h4>
<hr />
<div class="row">
    <div class="col-md-4">
        <form asp-action="Edit">
            <div asp-validation-summary="ModelOnly" class="text-danger"></div>
            <input type="hidden" asp-for="Id" />
            <div class="form-group">
                <label asp-for="Title" class="control-label"></label>
                <input asp-for="Title" class="form-control" />
                <span asp-validation-for="Title" class="text-danger"></span>
            </div>
            <div class="form-group">
                <label asp-for="Genre" class="control-label"></label>
                <input asp-for="Genre" class="form-control" />
                <span asp-validation-for="Genre" class="text-danger"></span>
            </div>
            <div class="form-group">
                <label asp-for="Price" class="control-label"></label>
                <input asp-for="Price" class="form-control" />
                <span asp-validation-for="Price" class="text-danger"></span>
            </div>
            <div class="form-group">
                <label asp-for="PublishDate" class="control-label"></label>
                <input asp-for="PublishDate" class="form-control" />
                <span asp-validation-for="PublishDate" class="text-danger"></span>
            </div>
            <div class="form-group">
                <input type="submit" value="Save" class="btn btn-primary" />
            </div>
        </form>
    </div>
</div>

<div>
    <a asp-action="Index">Back to List</a>
</div>
For the edit view, the model is of Book type as well.
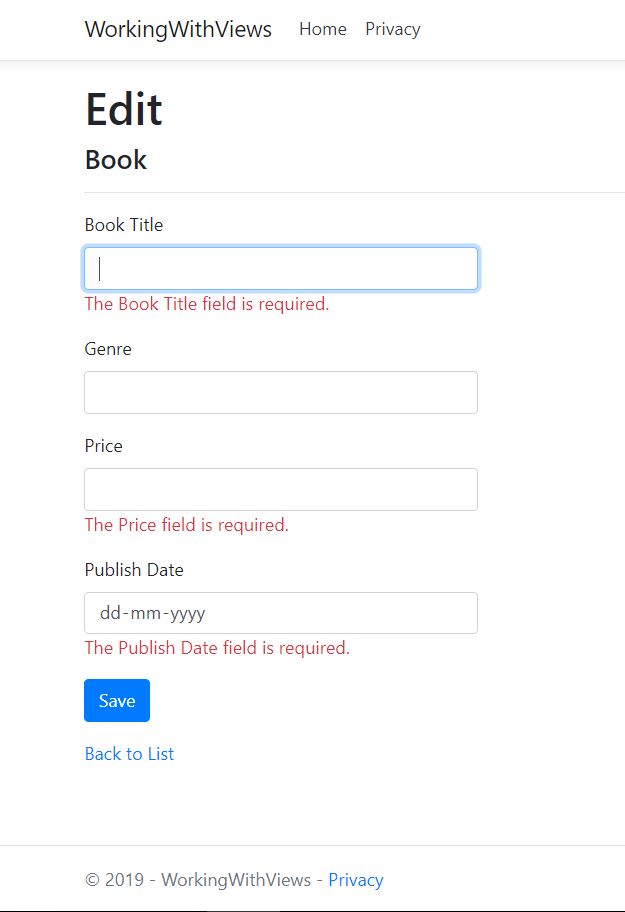
The asp-validation-summary tag helper is used for displaying the validation summary:
<div asp-validation-summary="ModelOnly" class="text-danger"></div>
ValidationSummary.ModelOnly will display only validation messages that apply to the model level. ValidationSummary.All will display both property and model level validations messages.
For each property, we have created a label for displaying the property name, an input field for editing the value and a span element for displaying the validation messages specific to that property:
<label asp-for="Title" class="control-label"></label>
<input asp-for="Title" class="form-control" />
<span asp-validation-for="Title" class="text-danger"></span>
We have a button for submitting the form towards the bottom:
<input type="submit" value="Save" class="btn btn-primary" />
When we try to save the page without providing valid values, validation errors will be displayed depending on the settings we provide for asp-validation-summary. So, let’s see this in action.
When we set the value as ModelOnly:
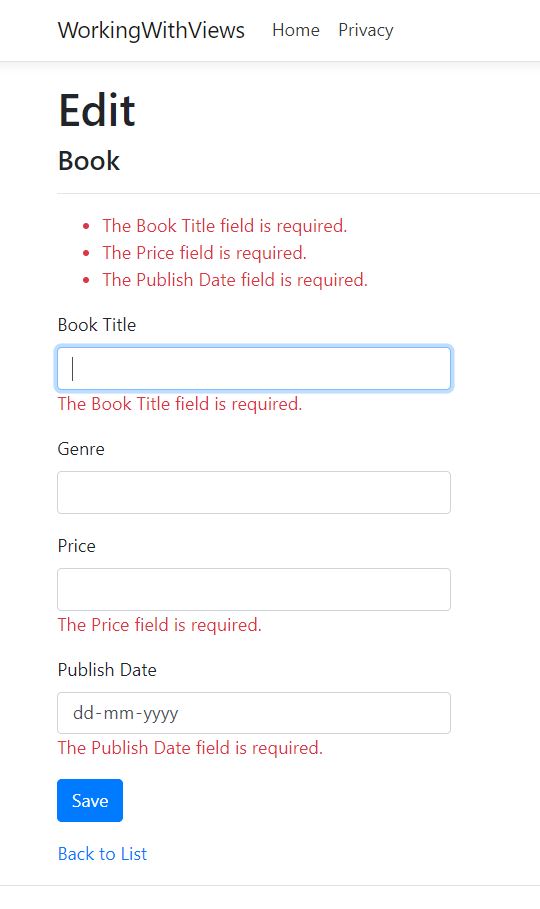
If the setting value is All:
That’s it. We have created views for the Index, Details and Edit pages.
The Concept of Partial Views
A partial view is a Razor markup file (.cshtml) that renders HTML output within another view’s rendered output.
Partial views are extremely useful in two scenarios. The first scenario is when we want to break up large markup files into smaller components. If our markup file is large, complex, and composed of several logical pieces, we should split each piece into a partial view. Then the code in the markup file will be manageable because the markup will only contain the overall page structure and references to the partial views.
The second scenario is when we want to reduce the duplication of common markup content across markup files. When we need to use the same markup elements across markup files, we can move that markup content into a partial view and reuse it. That way the future changes to that markup need to be done in just one place and we improved the modularity of our code.
However, the Partial view is not the recommended approach to maintain common layout elements. We’ll learn the best practice to create common layout elements in the next section.
Let’s say we need to display the Authors information in multiple places in our BookStore application. Creating a partial view for displaying the author’s information will be the ideal approach to go for.
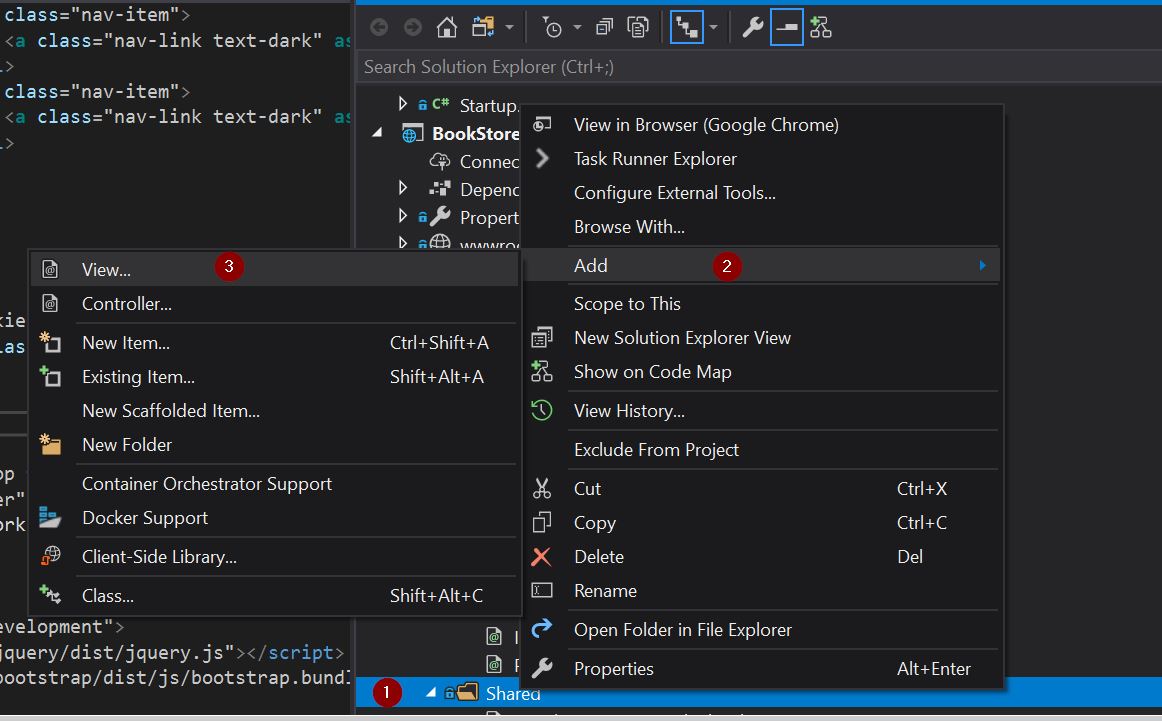
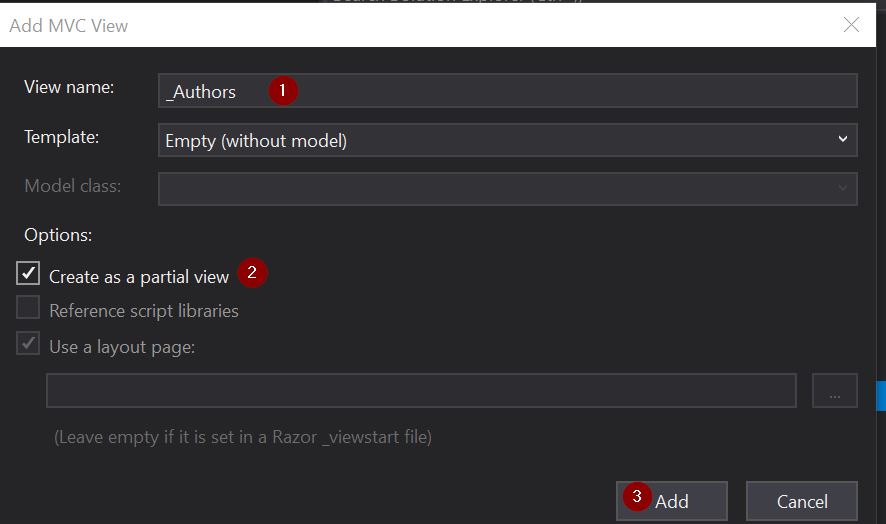
Right-click on the Shared folder and select Add -> View:
In the Add MVC View dialog box, we are going to give the View Name as _Authors, then check the Create as a Partial View option and click Add:
Let’s add some dummy text to the _authors.cshtml file:
<h3>Authors</h3>

<p>This section is used to display information about authors.</p>
Now, let’s add this partial view into the book details view using the partial tag helper:
<div>
        <partial name="_Authors" />
</div>
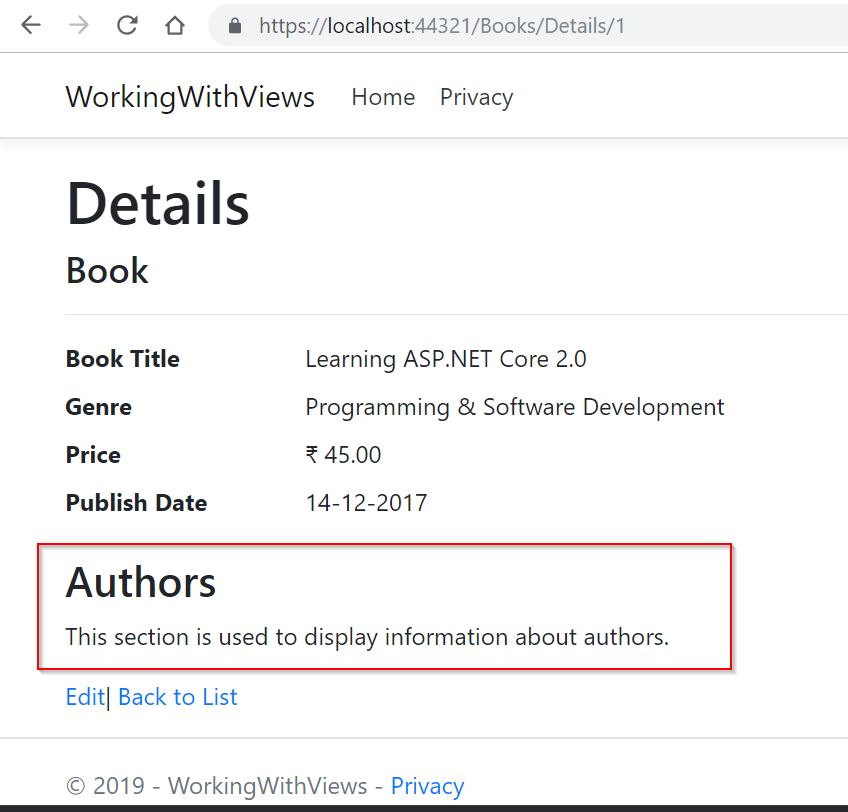
That’s it. We can see that the book details page now displays the Authors section as well:
We can reuse this section in other views by just placing this partial view inside them.
In this section, we’ve learned how to create a partial view and how to use it inside a view.
Layouts in ASP.NET Core
Most web applications have a common layout that provides the user with a consistent experience as they navigate between the pages. In an ASP.NET Core MVC application, we use a layout file to provide a consistent experience across the pages.
The layout typically includes common user interface elements such as a header, menu, and a footer. Many pages within the application shares common resources such as scripts and stylesheets. We can define all of these shared elements in a layout file, which can then be referenced by any view within the application. Layouts help in reducing duplicate code in views.
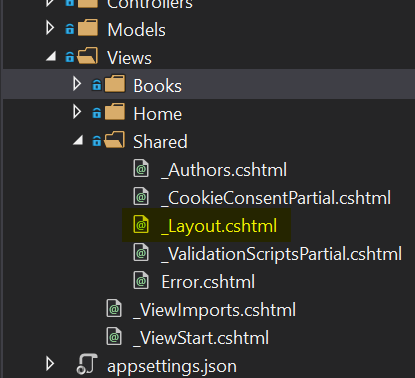
When we create an ASP.Net Core MVC application using the default template provided by Visual Studio, it generates a default layout file(_Layout.cshtml) and places in the Shared folder. While creating views, we have an option to specify a layout file. We can change this later by setting the Layout property of the view:
Now let’s examine the default layout file.
The layout file contains a <head> section at the top which contains the Title, link to the stylesheet etc.
<head>
    <meta charset="utf-8" />
    <meta name="viewport" content="width=device-width, initial-scale=1.0" />
    <title>@ViewData["Title"] - WorkingWithViews</title>
    <link rel="stylesheet" href="~/css/site.css" />
</head>
Then we have a <body> section which contains a header with the menu. The body also has a container div inside which the RenderBody() method is called. This method renders the content page:
<div class="container">
    <partial name="_CookieConsentPartial" />
    <main role="main" class="pb-3">
        @RenderBody()
    </main>
</div>
This is followed by a <footer> section.
We usually load the scripts towards the end of the document to ensure that all dependencies are loaded:
<script src="~/js/site.js" asp-append-version="true"></script>
@RenderSection("Scripts", required: false)
In this section, we learned how to maintain a consistent look and feel for our application using a Layout file.
Conclusion
In this article we looked at the following topics:
- Using Razor Markup to build Views
- Reusing sections of pages using Partial Views
- Creating a common look and feel for the application using Layout files
In the next part of this series, we’ll take a look at state management in ASP.NET Core MVC.
Amazing tutorial so far! Quick note, check out the BooksController code snippet lines 82 – 86. I believe there is some redundant/unwanted repetition of the return statement. Cheers!
Hello Lagrango. Thank you for that suggestion. It is fixed now. We should pay you for your services 🙂 🙂